Category: Cybersecurity

  • Stuck on Windows 10? Do This While You Plan Your Next Move

    Stuck on Windows 10? Do This While You Plan Your Next Move

    Stuck on Windows 10? Do This While You Plan Your Next Move

    If you cannot upgrade right now, reduce the risk while you work toward a supported system.

    VeriSecure Beginner Cyber Basics

    Your laptop still turns on. Your files are still there. Your browser still opens. So it is tempting to think, “It’s fine. I’ll deal with it later.”

    That is exactly how old tech becomes tomorrow’s emergency.

    Windows 10 support ended on October 14, 2025. That does not mean your computer instantly stops working. It means the safety net changed.

    If you cannot upgrade to Windows 11 right now, that is real. Not everyone has the money, hardware, time, or patience to replace a laptop on command.

    But staying on Windows 10 should not mean pretending nothing changed.

    This guide is your temporary risk-reduction plan while you figure out your next move.

    Important: This Is Temporary

    These steps can help reduce your risk, but they do not make Windows 10 fully supported again.

    Think of this as locking extra doors while you plan to move out of the old house. Helpful? Yes. A forever plan? No.

    Your long-term goal should still be to upgrade, replace the device, move sensitive work to a supported system, or use Extended Security Updates as a temporary bridge if that makes sense for your situation.

    Start Here: The Short Version

    • Turn on Windows Security protections.
    • Keep Windows, browsers, apps, and security tools updated.
    • Use strong passwords and MFA.
    • Stop using an admin account for everyday browsing.
    • Back up your files somewhere other than the laptop.
    • Use your browser more carefully.
    • Avoid sensitive tasks on this device when you can.
    • Set a realistic upgrade or replacement timeline.

    Start with Built-In Protection

    Windows already has built-in security tools. If you are stuck on Windows 10, make sure those tools are turned on and not sitting there like decorations.

    How to check Windows Security on Windows 10:

    1. Open Settings.
    2. Click Update & Security.
    3. Select Windows Security.
    4. Click Virus & threat protection.
    5. Make sure your protection settings are turned on.

    Also check:

    • Real-time protection: scans files and activity as you use the computer.
    • Tamper protection: helps stop unwanted changes to security settings.
    • Firewall: helps block unwanted network access.

    Why this matters: if your operating system is already older, you do not want your built-in protection turned off because some trial antivirus, random setting, or mystery popup got involved.

    Keep Everything Updated

    Even if Windows 10 itself is past regular support, you should still update everything you can.

    That includes:

    • browsers
    • security tools
    • apps you still use
    • printer/scanner software
    • password manager
    • router firmware

    How to check Windows Update:

    1. Open Settings.
    2. Click Update & Security.
    3. Select Windows Update.
    4. Click Check for updates.

    Why this matters: unsupported Windows is already a risk. Do not stack outdated apps and browsers on top of it like you are building a security dumpster fire with accessories.

    For a full breakdown, read this next: Windows Updates Are Annoying. Skipping Them Is Worse.

    Remove Apps and Extensions You Do Not Use

    Every extra app is another thing that may need updates, permissions, background access, or a security patch.

    Start by removing obvious clutter:

    • trial software
    • old games
    • coupon tools
    • shopping helpers
    • toolbars
    • browser extensions you did not install on purpose
    • apps you no longer use

    Be careful with anything that says driver, BIOS, firmware, chipset, graphics, audio, Wi-Fi, Bluetooth, or recovery. Those may control hardware features.

    Translation: delete the junk, not the laptop’s nervous system.

    Fix Your Passwords

    This is one of the biggest security gaps people have, and one of the easiest to start fixing.

    Do this:

    • Use a different password for every account.
    • Turn on multi-factor authentication, also called MFA.
    • Use a password manager if needed.
    • Do not save sensitive passwords in random notes, screenshots, or plain text files.
    • Avoid saving important passwords directly in the browser on an older unsupported system if you can use a trusted password manager instead.

    Why this matters: if one old password leaks, you do not want it opening your email, bank, shopping accounts, and half your life like a bad skeleton key.

    Want to test the style of password you are using? Try the VeriSecure tool here: Password Strength Checker

    Need help with MFA? Read this: Your Password Is Not Enough. Turn On MFA.

    Use Your Browser More Carefully

    Most everyday threats show up in the browser: scam links, fake login pages, bad downloads, shady extensions, fake tech support popups, and “urgent” messages that are somehow always written like a hostage note.

    Do this:

    • Use a supported browser like Edge, Chrome, or Firefox.
    • Keep the browser updated.
    • Turn on safe browsing or security protection settings.
    • Remove random extensions.
    • Be suspicious of links in emails, texts, DMs, and popups.
    • Do not download “updates” from random websites.

    A supported browser helps, but it does not magically fix an unsupported operating system. It lowers risk. It does not erase it.

    Not sure how to spot a bad link? Read this: That Link Looks Real. That’s the Problem.

    Avoid Sensitive Tasks on This Device When You Can

    If you have another supported device available, use that one for sensitive tasks.

    That includes:

    • banking
    • taxes
    • medical portals
    • password changes
    • shopping with saved payment cards
    • work accounts
    • anything involving Social Security numbers or sensitive documents

    If the Windows 10 laptop is your only device, tighten every setting you can and be extra careful with links, downloads, and login pages.

    This is not about panic. It is about not asking an older unsupported system to handle your most sensitive business if you have a better option.

    Stop Using Admin Access for Everything

    Running your computer as an administrator all the time gives malware more control if something goes wrong.

    For everyday browsing, email, shopping, and normal use, a Standard User account is safer.

    Important: Do not switch your only administrator account to a Standard User account unless you already have another administrator account on the laptop.

    If you only have one account right now, create a separate admin account first. Then use a Standard User account for everyday activity.

    Translation: keep one account with the keys to the house. Just stop using that account to wander around the internet barefoot.

    Read the full step-by-step guide here: How to Create a Standard User Account on a Windows Laptop

    Back Up Your Data

    If something goes wrong, your backup is what saves you.

    Back up files you would be furious to lose:

    • photos
    • documents
    • tax files
    • downloads
    • school or work files
    • important screenshots
    • anything you cannot easily replace

    Good options:

    • External drive: strong option, especially if you disconnect it after backing up.
    • Cloud storage: useful if you want access from another device.
    • Both: best for files that really matter.

    Note: Backup options can look different depending on your Windows 10 version. You may see Windows Backup, File History, OneDrive backup, or older Control Panel-style backup screens.

    The important part is this: keep a copy of your important files somewhere other than the laptop itself. A backup sitting only on the same old laptop is not a backup. It is wishful thinking with folders.

    Quick File History setup on Windows 10:

    1. Open Settings.
    2. Select Update & Security.
    3. Click Backup.
    4. Choose Add a drive.
    5. Select your external drive.

    Secure Your Wi-Fi

    Your network should not be an easy entry point.

    Do this:

    • Use a strong Wi-Fi password.
    • Use WPA2 or WPA3 if your router supports it.
    • Update your router firmware.
    • Change default router login credentials if they are still set.
    • Remove old devices from the network if you no longer use them.

    Why this matters: an older laptop is already not ideal. Do not pair it with a router still using default settings from the year flip phones had emotional significance.

    Set a Replacement or Upgrade Timeline

    If your laptop cannot move to Windows 11, pick a realistic deadline for your next step.

    That might mean:

    • replacing the laptop
    • moving sensitive tasks to a supported device
    • using Extended Security Updates temporarily if available
    • saving for a replacement
    • checking whether TPM or Secure Boot can be enabled
    • using the Windows 10 laptop only for low-risk tasks

    “Someday” is not a plan. It is where tech problems go to get expensive.

    When you are ready to upgrade, follow this guide: Still Using Windows 10? You Need a Plan.

    Quick Risk-Reduction Checklist

    • Turn on Windows Security protections.
    • Keep browsers, apps, and security tools updated.
    • Remove apps and browser extensions you do not use.
    • Use strong, unique passwords.
    • Turn on MFA for important accounts.
    • Use a Standard User account for everyday activity.
    • Back up important files to an external drive, cloud storage, or both.
    • Use a supported device for banking, taxes, and sensitive accounts when possible.
    • Secure your Wi-Fi and router.
    • Set a real upgrade or replacement timeline.

    The Takeaway

    You do not need to panic if you are stuck on Windows 10 for now.

    But you do need to stop treating it like nothing changed.

    These steps can reduce your risk while you plan your next move. They do not make Windows 10 fully supported again, and they do not replace upgrading or moving to a supported system.

    Which step are you going to tackle first: updates, passwords, backups, browser cleanup, or Wi-Fi? Drop it in the comments — and if you are stuck, ask before guessing.

    Reduce the risk now. Make the upgrade plan next. Do not let an old laptop become the weak link in your digital life.

  • Still using Windows 10? You shouldn’t be…

    Still using Windows 10? You shouldn’t be…

    Still Using Windows 10? You Need a Plan.

    Windows 10 support ended on October 14, 2025. Your laptop may still turn on, but the safety net is gone.

    VeriSecure Beginner Cyber Basics

    You open your laptop, check your email, pay a bill, maybe upload a document, and everything seems fine.

    That is the problem.

    Windows 10 will not suddenly burst into flames because support ended. It will still boot. Your files will still be there. Your apps may still open.

    But the safety net changed.

    Microsoft ended support for Windows 10 on October 14, 2025. That means Windows 10 is no longer getting the same free security fixes and support through regular Windows Update.

    Translation: the laptop may still work, but it is aging out of protection.

    And no, “it still turns on” is not a security strategy. That is just the computer equivalent of “the check engine light has been on for months, but the car still moves.”

    Start Here: Check Your Laptop First

    Do not guess whether your laptop can upgrade to Windows 11.

    Open Microsoft’s PC Health Check tool and click Check now. It tells you whether your device meets the Windows 11 requirements or whether you need a backup plan.

    This takes less than two minutes, which is less time than most people spend arguing with a printer that has one job and still chooses chaos.

    Action step: Before you close this tab, check whether your laptop can upgrade.

    Why This Matters Now

    This is not just about new features or prettier menus.

    It is about risk.

    When an operating system stops getting regular security fixes, newly discovered problems may stay open. Attackers love that. Unsupported systems are easier targets because criminals know those devices may be missing current protections.

    You do not need to be famous, rich, or running a business to get hit. Regular people lose access to email accounts, photos, tax documents, saved passwords, banking logins, and personal files every day.

    The cost is not just “security.”

    It can be time, money, stress, locked files, stolen accounts, or paying someone to recover data that should never have been at risk in the first place.

    Imagine losing your photos, tax documents, and saved passwords in one ransomware attack because an old system stayed online too long. That is not dramatic. That is the kind of mess people only take seriously after it happens to them.

    Why You Should Upgrade from Windows 10

    1. Windows 10 support has ended

    Windows 10 support ended on October 14, 2025.

    Your computer may still run, but Microsoft is no longer providing the same regular free security updates and technical support for Windows 10.

    That means newly discovered security holes may not get patched the way they would on a supported system.

    2. Outdated systems are easier targets

    Attackers often look for the easiest path in.

    Old operating systems, weak passwords, outdated browsers, and unpatched apps are all easy targets. You do not want your laptop sitting there like a front door with a cute welcome sign and no lock.

    3. Apps and browsers will fall behind

    Even if your laptop seems fine today, software does not wait forever.

    Browsers, apps, security tools, printers, scanners, and work software eventually move forward. Over time, you may run into compatibility problems, missing features, weaker performance, or apps that stop supporting Windows 10 properly.

    4. Windows 11 has stronger built-in protections

    Windows 11 was designed around newer security expectations.

    Depending on your device, it can use protections like TPM 2.0, Secure Boot, and hardware-based security features that help reduce certain risks.

    That does not make you invincible. But it gives you a stronger foundation than staying on an unsupported system and hoping bad things politely skip your laptop.

    5. Upgrading now gives you more control

    Waiting until something breaks is the stressful version of planning.

    If you check compatibility now, back up your files, and upgrade on your own schedule, you have options.

    If you wait until an app stops working, your computer gets infected, or your files are at risk, now you are making decisions under pressure. And pressure is where bad tech decisions go to breed.

    How to Upgrade from Windows 10

    Start simple. Do not download random upgrade tools. Do not follow a stranger’s “secret bypass” video. Use the official Microsoft path first.

    Step 1: Check if your computer is compatible

    Not every Windows 10 computer can upgrade to Windows 11.

    Windows 11 has hardware requirements, including things like TPM 2.0, Secure Boot, enough storage, and a supported processor.

    The easiest way to check is Microsoft’s PC Health Check tool.

    Option 1: Check if it is already installed

    • Click Start.
    • Type PC Health Check.
    • Open the app if it appears.
    • Click Check now.

    Option 2: Download it from Microsoft

    • Open your browser.
    • Search for PC Health Check Microsoft.
    • Open the official Microsoft page.
    • Download and install the PC Health Check app.
    • Open it and click Check now.

    If it says your device is compatible, you can move to the upgrade steps.

    If it says your device is not compatible, do not panic-buy the first replacement laptop you see. Back up your files first, then make a plan.

    Step 2: Back up your files first

    Before making any major system change, back up your important files.

    Save your documents, photos, downloads, tax files, and anything else you do not want to lose.

    • Use OneDrive or another trusted cloud backup.
    • Use an external hard drive.
    • Use both if the files really matter.

    Most upgrades go smoothly. “Most” is not the same as “guaranteed,” and your only copy of important files should not be riding shotgun during a major upgrade.

    Step 3: Make a quick list of important apps and devices

    Before upgrading, write down what you need to test afterward.

    • printer
    • scanner
    • work software
    • school software
    • tax software
    • browser bookmarks
    • password manager
    • email access
    • must-have apps

    Why? Because after the upgrade, you want to confirm the things you depend on still work. Otherwise you will remember the printer only when you urgently need it, which is exactly when printers become emotionally unavailable.

    Step 4: Run Windows Update

    On your Windows 10 computer:

    1. Open Settings.
    2. Click Update & Security.
    3. Select Windows Update.
    4. Click Check for updates.

    If your device qualifies, you may see the option to upgrade to Windows 11 directly from there.

    If you see it, follow the prompts.

    Step 5: Keep the laptop plugged in

    Once the upgrade starts, your computer may restart several times.

    Keep it plugged in. This is not the moment to trust a 17% battery and hope for the best.

    Do not shut it down in the middle of the upgrade unless Windows specifically tells you to.

    Step 6: Use Microsoft’s Installation Assistant if needed

    If Windows Update does not offer the upgrade but your device is eligible, go to Microsoft’s official Windows 11 download page and use the Windows 11 Installation Assistant.

    Use the official Microsoft download page only. Not a random “free upgrade” button from a site with twelve pop-ups and a logo that looks like it was made in a panic.

    What Not to Do

    This is where we avoid the “helpful” internet advice that turns a manageable upgrade into a weekend-long tech hostage situation.

    • Do not download Windows 11 upgrade tools from random websites. Use Microsoft’s official Windows Update or Windows 11 download page.
    • Do not force Windows 11 onto an unsupported laptop unless you truly know what you are doing. Unsupported workarounds can lead to update problems, instability, driver issues, or other headaches.
    • Do not ignore the PC Health Check results. If your device is not eligible, take that seriously and make a safer plan.
    • Do not upgrade before backing up your files. Your photos, documents, tax files, and passwords deserve better than “I’m sure it’ll be fine.”
    • Do not wait until apps stop working or your device gets infected. Emergency upgrades are stressful, messy, and usually happen at the worst possible time.

    Small Educational Note: What About Extended Security Updates?

    You may hear about Extended Security Updates, also called ESU.

    Microsoft offers Extended Security Updates for some Windows 10 users after the end of support, but treat that as a temporary bridge, not a long-term plan.

    ESU does not magically make Windows 10 young again. It is more like putting a temporary patch on an old roof while you figure out when to replace it.

    If you can upgrade to Windows 11, that should still be your cleaner long-term move.

    What If Your Computer Is Not Compatible?

    If your device does not meet the Windows 11 requirements, you still have options.

    • Check whether a setting needs to be enabled: sometimes TPM or Secure Boot may need to be turned on in BIOS/UEFI.
    • Back up your files immediately: do this before making any big decision.
    • Plan for a supported replacement: especially if the laptop is older, slow, or not worth investing in.
    • Reduce risk while you plan: tighten security settings, update everything else, use MFA, avoid risky browsing, and back up your data.

    If your laptop cannot upgrade to Windows 11 right now, do not panic. You still need a plan — not denial, not random upgrade hacks, and definitely not some sketchy “free Windows 11 installer” from a site that looks like it was built during a hostage situation.

    Start here instead: Stuck on Windows 10? Do This While You Plan Your Next Move.

    Quick Upgrade Checklist

    • Remember the deadline: Windows 10 support ended on October 14, 2025.
    • Open Microsoft’s PC Health Check tool and click Check now.
    • Back up your files before upgrading.
    • Make a quick list of printers, apps, scanners, and work software to test afterward.
    • Use Windows Update first if your device is eligible.
    • Use Microsoft’s official Windows 11 Installation Assistant if needed.
    • Keep the laptop plugged in during the upgrade.
    • Avoid random third-party upgrade tools and unsupported workarounds.
    • If your laptop cannot upgrade, follow a Windows 10 risk-reduction plan while you prepare your next move.

    The Takeaway

    Windows 10 did its job for a long time, but its support deadline has passed.

    If your device can upgrade, check compatibility, back up your files, and move to Windows 11 using Microsoft’s official tools.

    If your device cannot upgrade, do not ignore the problem. Use a risk-reduction plan while you prepare your next move: Stuck on Windows 10? Do This While You Plan Your Next Move.

    Don’t close this tab until you open PC Health Check. In less than two minutes, you’ll know whether this laptop can move forward — or whether it needs a plan B.

  • How to Create a System Restore Point on a Windows Laptop (and How to Use It)

    How to Create a System Restore Point on a Windows Laptop (and How to Use It)

    How to Create a System Restore Point on Windows

    Before you uninstall apps, change settings, or let Windows “help,” give yourself a way back.

    VeriSecure Beginner Cyber Basics

    You are about to clean up your new laptop.

    Maybe you are removing bloatware. Maybe you are installing something new. Maybe you are clicking around in settings because Windows hid one normal option behind seven menus, because apparently that builds character.

    Before you start making changes, do one small thing first:

    Create a system restore point.

    A restore point gives Windows a snapshot of important system settings and files. If something goes sideways, you may be able to roll your system back to that earlier point.

    It is not exciting. It is not flashy. It is also exactly the kind of boring safety step you will wish you had taken if your laptop starts acting possessed after an install or cleanup.

    What a System Restore Point Does

    A restore point can help undo certain system changes.

    It can help if a recent install, driver update, system setting, or cleanup causes problems.

    A restore point can help with things like:

    • system settings that changed
    • recent driver or software issues
    • problems after installing or removing apps
    • Windows acting strange after a change

    Basically, it gives you a “go back to before I touched this” option. Which is useful, because sometimes the problem is not you. Sometimes software is just built like a junk drawer with a login screen.

    Important: This Is Not a Full Backup

    A restore point is not the same thing as backing up your files.

    System Restore is meant to help roll back system settings and certain changes. It is not a replacement for saving copies of your documents, photos, downloads, or important files somewhere safe.

    Translation: use restore points for system changes. Use backups for files you would be furious to lose.

    How to Create a System Restore Point

    This takes a few minutes, and yes, the window looks like it wandered in from an older version of Windows. That is normal.

    1. Click Start.
    2. Type Create a restore point.
    3. Select Create a restore point from the search results.
    4. Under Protection Settings, select your system drive.
    5. Look for the drive labeled (System), usually next to the C: drive.
    6. Click Configure.
    7. Select Turn on system protection.
    8. Click OK.
    9. Click Create.
    10. Enter a simple name, like Before app cleanup or Before installing software.
    11. Click Create again.

    When Windows finishes, you should see a message that the restore point was created successfully.

    That is your safety net. Not a miracle. Not a backup. But a very useful “undo” option for system changes.

    Visual Tip

    If you are adding screenshots to this guide, the most helpful ones are:

    • the Windows search result for Create a restore point
    • the System Properties window
    • the Protection Settings list showing the C: drive
    • the Configure button
    • the Turn on system protection option
    • the Create button
    • the System Restore button

    Screenshots help because Windows menus do not always look exactly the same across devices and versions. Which is fun, if your definition of fun is “where did they move the button this time?”

    Before You Restore: Read This First

    System Restore may take several minutes to complete. Your laptop may restart during the process.

    Do not turn off your laptop while System Restore is running.

    I know staring at a progress screen feels suspicious. Let it finish anyway. Interrupting a restore is how you turn a small problem into a bigger one with extra attitude.

    How to Restore Your System

    If something goes wrong, you can try rolling Windows back to the restore point you created.

    1. Click Start.
    2. Type Create a restore point.
    3. Open Create a restore point.
    4. Click System Restore.
    5. Click Next.
    6. Select the restore point you want to use.
    7. Click Next.
    8. Click Finish.

    Your laptop will restart and begin the restore process.

    Let it run. Do not shut the laptop off halfway through because the screen looks boring. Boring is good here. Boring means Windows is working.

    What a Restore Point Does and Does Not Do

    A restore point can:

    • restore certain system settings
    • undo some recent system changes
    • help fix issues caused by installs, drivers, or updates
    • roll Windows back to an earlier working state

    A restore point will not:

    • replace a full backup
    • protect every personal file
    • save copies of all your documents, photos, downloads, or folders
    • guarantee every problem can be fixed

    Microsoft says System Restore is designed to undo recent system changes without affecting personal files, but you should still back up important files separately. Because “should be fine” is not a backup plan.

    When You Should Create a Restore Point

    Create a restore point before making changes that could affect how Windows behaves.

    Good times to create one:

    • before uninstalling apps
    • before removing bloatware
    • before installing new software
    • before updating drivers
    • before changing system settings
    • before trying a fix you found online from someone named TechWizard1978

    It takes a few minutes. That is much less painful than trying to remember what you changed after your laptop starts acting weird.

    Quick Restore Point Checklist

    • Create a restore point before removing apps or changing system settings.
    • Look for the drive labeled (System), usually next to C:.
    • Turn on system protection if it is not already enabled.
    • Name your restore point something clear, like Before app cleanup.
    • Do not turn off your laptop during System Restore.
    • Remember: restore points help with system changes, but they are not full file backups.

    The Takeaway

    A restore point is one of those boring little steps that feels unnecessary right up until something breaks.

    Create one before cleanup, installs, driver updates, or system changes.

    Give yourself a way back before Windows gives you a reason to need one.

  • What Apps to Delete From a New Windows Laptop (Bloatware Guide)

    What Apps to Delete From a New Windows Laptop (Bloatware Guide)

    How to Clean Up Your New Windows Laptop

    A beginner-friendly bloatware removal guide for making your laptop feel like yours — not a billboard with a keyboard.

    VeriSecure Beginner Cyber Basics

    You open your brand-new Windows laptop, expecting a clean start.

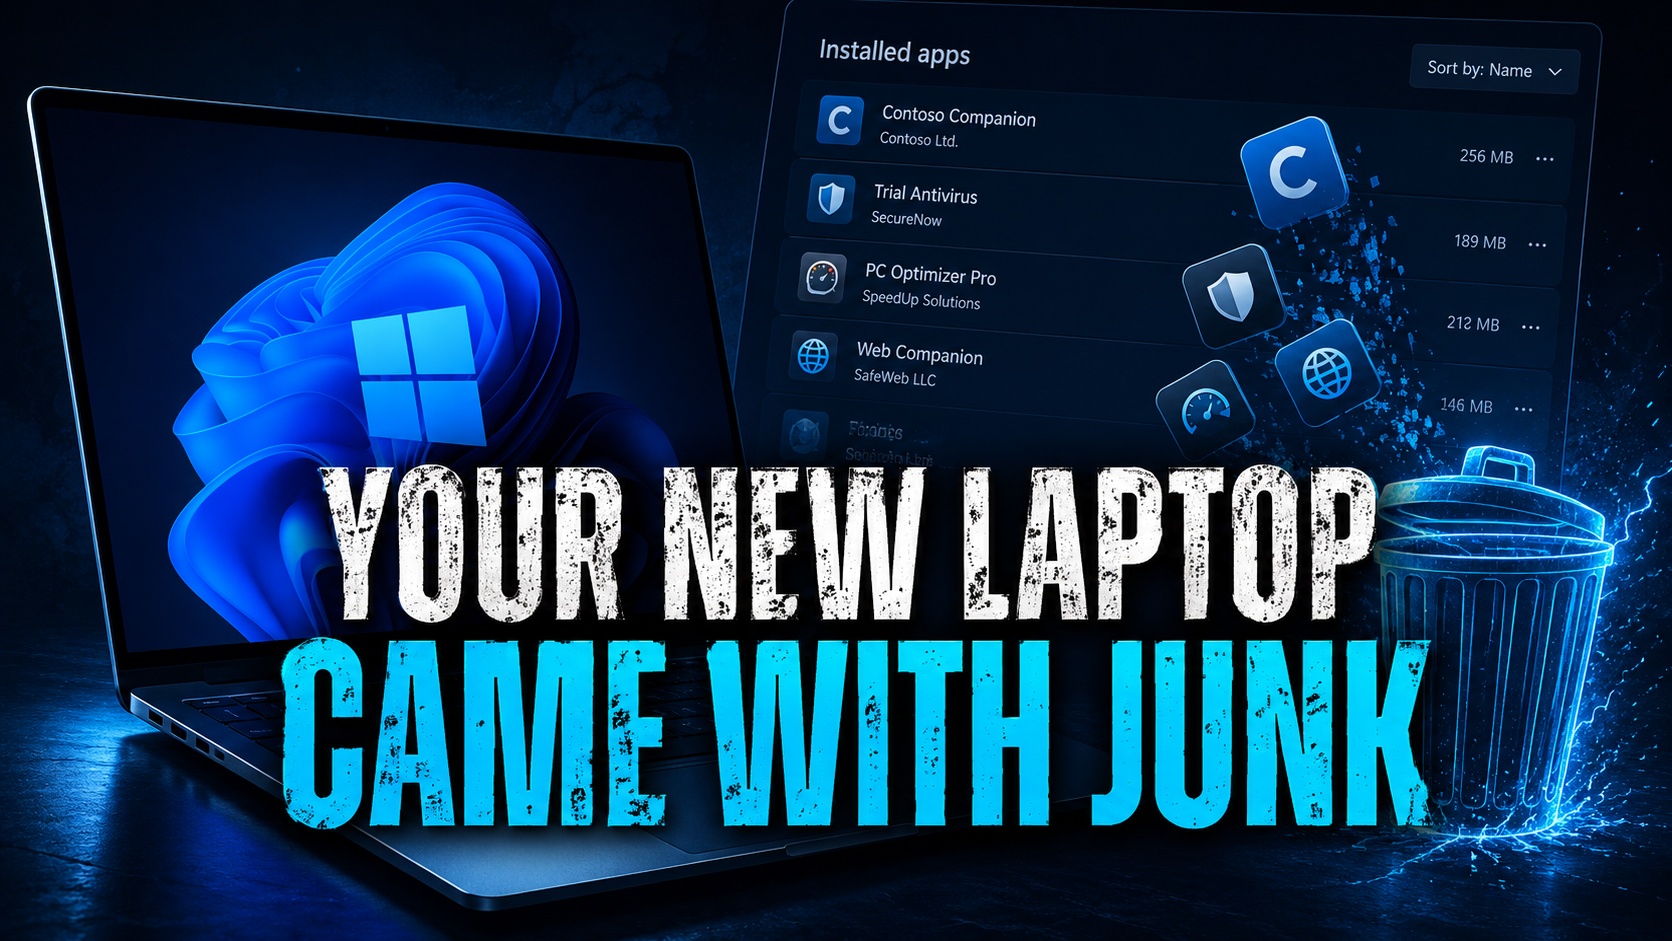
    Instead, the Start menu is already packed with trial antivirus pop-ups, games you never asked for, shopping apps, “helpful” manufacturer tools, and at least one mystery program acting like it owns the place.

    Congratulations. Your new laptop came preloaded with someone else’s clutter.

    That clutter is usually called bloatware.

    Some of it is harmless. Some of it is annoying. Some of it runs in the background, nags you to upgrade, slows things down, or adds extra software you do not need.

    Cleaning it up is one of the easiest ways to make a new computer feel faster, cleaner, and more like it belongs to you.

    What Is Bloatware?

    Bloatware is software that comes pre-installed on your laptop by the manufacturer, Microsoft, or third-party partners.

    It usually includes things like:

    • Trial antivirus programs: often loud, needy, and very committed to reminding you they exist.
    • Pre-installed games: fine if you want them, clutter if you do not.
    • Manufacturer apps: some are useful, some duplicate Windows features, and some feel like they were designed by a committee that hates free time.
    • Shopping or deal apps: usually there to push offers, coupons, ads, or browser changes.
    • Extra media tools: players, editors, or launchers you may never open.

    Not all bloatware is dangerous. The problem is that unnecessary software creates clutter, background noise, extra notifications, and sometimes extra risk.

    If you do not use it, need it, recognize it, or trust it, it deserves a closer look.

    Do This First: Create a Restore Point

    Before you start deleting things, create a system restore point.

    This gives you a safety net if you remove something and your laptop starts acting like you personally offended it.

    How to create one:

    1. Click the Windows search bar.
    2. Type Create a restore point.
    3. Select the result that appears.
    4. In the System Protection window, click Create.
    5. Name it something simple, like Before bloatware cleanup.
    6. Click Create again.

    It only takes a minute. Future-you may thank present-you instead of muttering at the screen.

    How to Remove Apps on Windows

    Start with the easy cleanup first. Windows gives you a built-in uninstall option.

    1. Click Start.
    2. Open Settings.
    3. Go to Apps.
    4. Select Installed apps.
    5. Find the app you want to remove.
    6. Click the three dots next to it.
    7. Select Uninstall.
    8. Follow the prompts.

    If Windows says an app cannot be removed there, leave it alone for now. Do not start hunting through system folders like you are defusing a bomb with vibes.

    Apps You Can Usually Remove

    These are usually safe places to start, especially if you know you do not use them:

    • Free trial antivirus: remove it if you do not plan to use it, but check Windows Security afterward.
    • Pre-installed games: if you did not ask for them and do not play them, clear them out.
    • Shopping or deal apps: coupon tools, shopping assistants, and deal pop-ups can usually go.
    • Unused media players: if you already use something else, you may not need the extra one.
    • Duplicate cloud storage tools: keep the one you use; remove the ones just taking up space and asking for attention.

    Why remove them? Less clutter. Fewer pop-ups. Fewer apps trying to launch, update, advertise, or wedge themselves into your browser like they pay rent.

    What Not to Touch

    This is the part where we do not uninstall the laptop’s kneecaps.

    If you see anything with words like these, slow down:

    • driver
    • BIOS
    • firmware
    • chipset
    • graphics
    • audio
    • Wi-Fi
    • Bluetooth
    • touchpad
    • hotkeys
    • recovery
    • Microsoft system components

    Those may control hardware features on your laptop. Removing the wrong one can break sound, display settings, keyboard shortcuts, fingerprint login, Wi-Fi, Bluetooth, or battery tools.

    If you do not recognize a program, look it up before uninstalling it. Yes, that extra step is annoying. It is still better than deleting something important and then spending your evening trying to resurrect your touchpad.

    Small Educational Note: Check Windows Security After Removing Antivirus Trials

    If you remove a trial antivirus, make sure Windows Security and Microsoft Defender are turned on afterward.

    Microsoft Defender is built into Windows and is enough for many everyday users, as long as Windows Security is enabled and kept updated.

    Do not leave yourself with no protection because two security apps were fighting like toddlers over a toy.

    To check it, search for Windows Security, open it, and review Virus & threat protection.

    Do Not Forget Browser Extensions

    Some junk does not show up as a normal app. It hides in your browser.

    Open your browser extensions and remove anything you did not install on purpose, especially:

    • shopping helpers
    • coupon tools
    • search add-ons
    • toolbars
    • homepage changers
    • anything that promises to “improve your browsing experience” while quietly making everything worse

    Browser extensions can sometimes see or change what you do in your browser, depending on their permissions. So if you do not know why it is there, it does not get a free pass.

    Manage Your Startup Apps

    If your laptop still feels sluggish, the problem may not be what is installed. It may be what is launching every time you turn the laptop on.

    To check startup apps:

    1. Right-click Start.
    2. Select Task Manager.
    3. Open the Startup apps tab.
    4. Review what is set to launch automatically.
    5. Disable apps you do not need running immediately at startup.

    Do not disable security tools, drivers, or anything you do not understand without checking first.

    But if a coupon app, music launcher, game helper, or random updater is starting every time Windows boots, that is not productivity. That is freeloading.

    After You Uninstall: Restart and Check Again

    Once you remove the obvious junk, restart your laptop.

    Then go back to Installed apps, Startup apps, and your browser extensions to make sure the clutter is really gone.

    Some apps leave behind prompts, startup entries, browser add-ons, or little “helpers” that act like they were not just told to leave.

    Check once more. It is easier than letting clingy software keep showing up like an ex who still has your Netflix password.

    Quick Cleanup Checklist

    • Create a restore point before removing apps.
    • Remove trial software, games, shopping apps, and unused extras you do not need.
    • Do not remove drivers, BIOS, firmware, chipset, recovery, or hardware-related tools unless you know what they do.
    • Check Windows Security after removing antivirus trials.
    • Review browser extensions for coupon tools, toolbars, and search add-ons.
    • Disable unnecessary startup apps.
    • Restart and check again.

    The Takeaway

    You do not need dozens of background apps running on a brand-new laptop.

    You also do not need to panic-delete every unfamiliar program like you are cleaning evidence out of a crime scene.

    Remove the obvious junk. Leave important system and hardware tools alone. Check startup apps and browser extensions.

    Keep what helps. Remove what nags. Do not let a brand-new laptop come preloaded with someone else’s clutter.

  • How to Check Windows Security Settings (Firewall & Antivirus)

    How to Check Windows Security Settings (Firewall & Antivirus)

    Windows Security

    Your laptop has built-in protection. Make sure it is actually on.

    Windows includes basic antivirus and firewall protection, but that only helps if the settings are enabled, updated, and not buried under warnings you never checked.

    You bought a Windows laptop and assumed the security was already handled. Valid, but dangerous.

    Windows does include built-in antivirus and firewall protection. The annoying part? Microsoft tucked the important settings behind menus most people never open, because apparently “secure by default” still needed a scavenger hunt.

    The good news: you don’t need to bloat your machine with extra software just to get basic protection. You just need to check that what you already have is actually awake.

    Quick note: These steps are for Windows 10 and 11. Your screen might look a little different depending on your specific update; Windows settings menus love to move the furniture around for no reason.

    What you are checking

    You are looking for four basic things:

    • No current threats in Windows Security
    • Real-time protection enabled
    • Firewall active for your networks
    • Windows Update not sitting there with a pile of ignored updates

    That is your baseline. Nothing fancy, just the bare minimum to keep the bad guys out.

    How to check antivirus protection

    Windows Security is where Microsoft hides all the good stuff. Here is how to find it:

    1. Click Start and type Windows Security.
    2. Open the app and click Virus & threat protection.
    3. Check for the No current threats status.
    4. Under Virus & threat protection settings, click Manage settings.
    5. Ensure Real-time protection is set to On.

    Why this matters: Real-time protection catches threats in the background while you’re browsing the web. A manual scan is nice, but real-time is the only thing protecting you while you click through the chaos of the modern internet.

    How to check firewall settings

    Your firewall controls what gets in and out. It’s not glamorous, but it’s essential.

    1. Open Windows Security.
    2. Click Firewall & network protection.
    3. Confirm that Domain, Private, and Public networks all show Firewall is on.

    Why this matters: This helps block unwanted connections. Crucial if you’re using public Wi-Fi at airports or coffee shops, where everyone else is connected to the same digital soup.

    What if something is turned off?

    If you can’t toggle these back on, check if a third-party antivirus has taken the wheel. Sometimes these programs disable Windows Security settings by default.

    Insider note: If you see an antivirus program you don’t recognize, don’t ignore it. It might be bloatware that’s just getting in the way.
    • If you recognize it: Open that app directly to check your status.
    • If you don’t: Research it before trusting it.
    • If a browser popup says you are infected: Close the tab. Immediately. Real Windows alerts don’t scream at you in a browser window; that’s just a scammer looking for a panic click.

    Run a quick scan

    If your laptop is acting sluggish or throwing strange popups, run a scan while you’re already in the menus.

    1. In Windows Security, click Virus & threat protection.
    2. Click Quick scan.

    It’s not a magic wand, but it’s a good first check if your laptop has suddenly developed a “personality” you didn’t ask for.

    Do an update check

    Security tools are useless if they’re outdated. I know, restarting your computer is an inconvenience, but attackers love unpatched systems—they do the hard work for them.

    1. Go to Settings > Windows Update.
    2. Click Check for updates and install whatever is pending.

    A note on “Ransomware protection”

    Windows has a feature called “Controlled folder access.” It sounds great, but honestly? It’s often overkill for beginners and loves to block apps you actually need. Skip the headache for now. Stick to the core trio: Antivirus on, Firewall on, Updates current.

    Quick Security Checklist

    Before you close the menu, ensure you have these:

    • Windows Security shows no active warnings.
    • Real-time protection is set to On.
    • Firewall is active for all network profiles.
    • Windows Update is fully current.
    • No “mystery” antivirus programs are cluttering up your settings.

    Related VeriSecure resources

    If you’re locking down your machine, check these next:

    Take control now

    Don’t assume you’re protected just because you bought a Windows machine. Take five minutes to verify these settings yourself.

    Do it now, and your future self will thank you when you avoid the next panic spiral.

  • How to Turn On Encryption on a Windows Laptop (BitLocker)

    How to Turn On Encryption on a Windows Laptop (BitLocker)

    Windows Security

    If your laptop disappears, your files should not go with it.

    Encryption helps protect your files if your Windows laptop is lost, stolen, or pulled apart by someone who should not have access to your data.

    Picture this: you leave your laptop in a rideshare, airport tray, hotel lobby, coffee shop, or wherever your brain decided to briefly resign for the day.

    Annoying? Absolutely.

    But the bigger problem is not the laptop itself. It is what is on it.

    Saved documents. Downloads. Tax forms. Client files. Browser data. Personal photos. Maybe even that one folder you really meant to clean up six months ago.

    Encryption helps protect that data by locking the drive so someone cannot easily pull your files straight off the device.

    Plain-English version: Encryption scrambles the data on your drive so it cannot be easily read without the right login, recovery key, or unlock method.

    What Windows calls encryption

    On Windows, encryption may show up as Device Encryption or BitLocker, depending on your Windows edition, hardware, and setup.

    Because one name would have been too kind, apparently.

    • Device Encryption is the simpler version many everyday Windows devices may show in Settings.
    • BitLocker Drive Encryption is the more full-featured option, often seen on Windows Pro, Enterprise, or work-managed devices.

    The goal is the same: protect the data on your drive if the laptop is lost, stolen, or accessed outside your normal login.

    Before you turn encryption on

    Do not just click buttons and hope Windows has your back. That is how people end up locked out and yelling at a screen like it can feel shame.

    Before you start:

    • Use an administrator account. You may need admin rights to change encryption settings.
    • Plug in your laptop. Encryption can take time, and you do not want the device dying halfway through.
    • Know your Microsoft account login. Your recovery key may be stored there.
    • Make sure your MFA method works. If your Microsoft account uses text, email, authenticator app, or another MFA method, make sure you can access it.
    • Save your recovery key plan outside the laptop. Not in a note saved only on the device you are encrypting. That is locking your spare key inside the house.
    Important: If your recovery key is saved to your Microsoft account, that only helps if you can sign into that Microsoft account from another device. Save your Microsoft account email, password, and MFA access method somewhere safe outside your laptop.

    How to check if encryption is already on

    Some Windows laptops already have Device Encryption enabled. Great. Love when the machine does one helpful thing without making it a whole project.

    1. Click Start.
    2. Open Settings.
    3. Go to Privacy & security.
    4. Look for Device encryption.
    5. Open it and check whether encryption is turned On.

    Why this matters: you do not need to turn on something that is already working. You just need to confirm it is enabled and know where the recovery key is stored.

    How to turn on Device Encryption

    If your laptop shows Device Encryption, start here.

    1. Sign in using an administrator account.
    2. Click Start.
    3. Open Settings.
    4. Go to Privacy & security.
    5. Click Device encryption.
    6. If available, turn Device encryption On.

    Why this matters: Device Encryption helps protect the drive without making you manage a bunch of extra settings. It is usually the beginner-friendly path when your device supports it.

    If you see BitLocker instead

    If your device shows BitLocker, the steps may look a little different. Because Windows enjoys making simple things feel like a side quest.

    1. Open Control Panel.
    2. Click System and Security.
    3. Select BitLocker Drive Encryption.
    4. Click Turn on BitLocker.
    5. Choose how you want to unlock the drive.
    6. Back up your recovery key.
    7. Follow the prompts to start encryption.

    Why this matters: BitLocker gives you drive encryption, but the recovery key step is not optional background noise. It is the thing that may save you if Windows asks for proof later.

    Do not skip the recovery key

    When you turn on Device Encryption or BitLocker, Windows may save a recovery key to your Microsoft account, work account, or school account. In some cases, it may ask you where you want to save it.

    The recovery key is your backup way into the drive if Windows ever needs extra proof that you are allowed in.

    And yes, this is one of those boring details that suddenly becomes very exciting when you are locked out.

    • Check where the recovery key is saved.
    • Make sure you can sign into that Microsoft, work, or school account from another device.
    • Save your Microsoft account credentials somewhere safe outside the laptop.
    • Make sure you can access your MFA method without that laptop.
    • Do not keep the only copy of the recovery key on the laptop you are encrypting.
    Recovery key reality check: If you forget your password, lose access to your Microsoft account, cannot pass MFA, and do not have the recovery key, you may not be able to access your files.

    Where to keep your recovery key access

    You do not need to tape your life to the refrigerator, but you do need a real recovery plan.

    Good options include:

    • Your Microsoft account, if you know the login and can access MFA from another device.
    • A trusted password manager that you can access from another device.
    • A printed emergency sheet stored somewhere safe.
    • Your work or school account, if this is a managed device and your organization handles recovery keys.

    Why this matters: saving the recovery key online is helpful only if you can get into the account that stores it. If your only copy of the Microsoft password is saved on the locked laptop, congratulations, the circle of nonsense is complete.

    What encryption does not protect you from

    Encryption is useful, but it is not a magic force field.

    It helps protect your files when someone does not have your login, recovery key, or unlock method. It does not protect you from every bad decision the internet throws at you.

    • It will not stop phishing emails. You still need to avoid sketchy links and fake login pages.
    • It will not block malware after you are signed in. Your antivirus and safe browsing habits still matter.
    • It will not help if someone has your password. Encryption is not a substitute for a strong, unique login.
    • It will not protect files if your laptop is stolen while it is unlocked. Lock your screen when you walk away.
    Small educational note: Encryption protects the data on the drive. It does not replace updates, antivirus, MFA, safe clicking, or common sense — rude, but true.

    What if you do not see encryption?

    If you do not see Device Encryption, do not panic. Some devices do not support it, and some Windows editions show BitLocker somewhere else.

    Try this:

    • Search Device encryption from the Start menu.
    • Search BitLocker from the Start menu.
    • Check Settings → Privacy & security → Device security.
    • Make sure Windows is fully updated.
    • Check your Windows edition if the option still does not appear.

    If the option still is not there, your device or Windows edition may not support that encryption feature. Annoying, yes. Your fault, no.

    Quick encryption checklist

    Before you move on, make sure these are handled:

    • You checked whether Device Encryption or BitLocker is already on.
    • You turned encryption on if your device supports it.
    • You know where the recovery key is saved.
    • You can access your Microsoft, work, or school account from another device.
    • You saved your Microsoft account credentials somewhere safe outside the laptop.
    • You can access your MFA method without relying only on the encrypted laptop.
    • You understand encryption protects stored files, not every possible threat.

    Related VeriSecure resources

    If you are locking down a Windows laptop, these are good next steps:

    Do this before you forget

    Turn on encryption if your laptop supports it. Then check where the recovery key is saved.

    Do not leave your only recovery path trapped on the same laptop you are protecting. That is not a backup plan. That is a locked door with the spare key sitting inside.

    Encrypt the laptop. Save the recovery key access somewhere safe. Make sure you can get into your Microsoft account from another device.

  • Stop Hitting “Remind Me Later” on Windows Updates

    Stop Hitting “Remind Me Later” on Windows Updates

    Stop Ignoring Windows Updates

    Here’s how to make them less annoying, less disruptive, and way less likely to ruin your day.

    VeriSecure Beginner Cyber Basics

    You’re in the middle of paying a bill, filling out a form, editing a document, or doing anything that requires two working brain cells.

    Then Windows pops up like an overpaid hall monitor:

    Restart required.

    So you click Remind me later.

    Then later becomes tomorrow. Tomorrow becomes next week. Next week becomes “why is my laptop acting weird?”

    I get it. Updates are annoying. They pop up at the worst possible time, use vague language, and somehow make you feel like you’re doing something wrong just by owning a computer.

    But ignoring updates is basically leaving your digital front door unlocked on purpose.

    The good news? You do not need to understand every patch note. You just need to make sure Windows is allowed to do its job without ambushing you during the worst five minutes of your day.

    Why Windows Updates Matter

    Updates are not just “new features” or tiny performance tweaks nobody asked for.

    A lot of them fix security holes that are already known. And once a weakness is known, attackers do not politely wait for you to catch up. They look for people who have not patched yet.

    That means skipping updates can leave your laptop exposed to problems that already have a fix.

    How to Check Your Windows Update Settings

    Microsoft hides these settings in menus that feel like they were designed by someone who has never met a normal human being.

    Here is the shortcut version.

    1. Click StartSettings.
    2. Go to Windows Update.
    3. If updates are paused, click Resume updates.
    4. Click Advanced options.
    5. Turn on Receive updates for other Microsoft products.
    6. Go back to the main Windows Update screen.
    7. Click Check for updates.

    That “other Microsoft products” setting matters because Windows is not the only thing that may need fixing. It can help Microsoft apps get updates too, not just the operating system.

    And if updates were paused? Unpause them. The pause button is fine for a short delay, but it should not become your laptop’s permanent lifestyle choice.

    The “Stop Interrupting Me” Fix: Active Hours

    The reason most people hate updates is not because they hate security.

    It is because Windows has a special talent for wanting attention right when you are busy, tired, irritated, or one click away from finishing something important.

    That is where Active Hours helps.

    Active Hours tells Windows when you normally use your laptop, so it is less likely to restart during that time.

    1. Go to StartSettings.
    2. Click Windows Update.
    3. Click Advanced options.
    4. Select Active hours.
    5. Choose Manually if you want to set the hours yourself.
    6. Set the window for when you usually use your laptop.

    This does not stop updates. It just helps stop Windows from barging in like it owns your afternoon.

    Small Educational Note: Restart Means Finish the Job

    Some updates do not fully install until your laptop restarts.

    Yes, that is annoying. No, the wording does not make it clearer. Apparently “pending restart” was the best phrase everyone could agree on.

    But if Windows says it needs a restart, schedule it when you have a few minutes. Otherwise, you may be sitting there with updates half-finished, which defeats the whole point.

    What Happens If You Keep Skipping Updates?

    Skipping updates does not make the problem disappear. It just leaves the fix sitting there unused.

    • You leave known security holes open. If there is already a patch, that means the weakness is already on the radar.
    • You make your laptop easier to target. Attackers often look for systems that are behind because those are easier wins.
    • You weaken your built-in protection. Security tools work better when the system underneath them is kept current.
    • You create more problems later. The longer you wait, the more updates pile up, and the more annoying the whole process becomes.

    Basically, skipping updates is like ignoring a recall notice because the envelope was ugly.

    Still on Windows 10?

    If your laptop is still running Windows 10, check whether it can upgrade to Windows 11.

    Windows 10 support ended on October 14, 2025. Your computer may still turn on and work, but that does not mean it is getting the same regular free security updates through Windows Update.

    That does not mean panic-click the first random upgrade pop-up you see. It means go through your real Windows settings and check your options the right way.

    1. Click StartSettings.
    2. Go to Windows Update.
    3. Look for upgrade eligibility or available update options.
    4. If your device is not eligible, start planning your next step instead of ignoring the warning forever.

    Quick Checklist

    • Open Windows Update.
    • Resume updates if they are paused.
    • Turn on updates for other Microsoft products.
    • Click Check for updates.
    • Set Active Hours.
    • Restart when Windows needs to finish installing updates.
    • If you are still on Windows 10, check your upgrade options.

    The Takeaway

    You do not need to read every update note. You do not need to become a system administrator. You do not need to pretend Microsoft made this process charming.

    You just need to make sure updates are not paused, Microsoft product updates are included, Active Hours are set, and restarts happen when needed.

    Do the boring setup once. Let the laptop handle the background noise. Stop giving known security problems a free place to live.